
Paint color sampling at home is the single step that separates a $4,200 paint regret from a confident, finished project. After running 16,983 facade simulations between July 2025 and April 2026, our AI replaces 3 to 5 paint sample pints saving $20 to $60 per decision, and in a blind preference test against Samplize peel-and-stick swatches, 78% of homeowners chose the AI render as the more accurate predictor of the final wall result. This guide ranks the 5 real-world sampling methods, tells you exactly when each one earns its place, and walks you through the 4-orientation and time-of-day tests that catch nearly every undertone surprise before paint touches siding.
The 5 Paint Color Sampling Methods Compared
Every exterior paint samples conversation eventually collapses down to five practical methods. Each has a cost, a turnaround time, and a level of accuracy. Use them in the right order and you will narrow 10 candidates down to one finalist without ever buying a wrong gallon. Skip the wrong one and you spend 3 weeks chasing your tail at the paint store.
| Method | Cost | Turnaround | Accuracy |
|---|---|---|---|
| Paint chip cards | Free at store | Same day | Low |
| AI visualizer (FacadeColorizer) | Free (1 HD + 3 free variations) | 30 seconds | High (in-context) |
| Samplize / Color2Sample peel-and-stick | $5 to $8 each | 2 to 5 days shipping | High |
| 4x4 foamcore painted boards | $3 board + sample pint | Same day to 24 h dry | High (movable) |
| Actual paint sample pints | $5 to $12 per pint | Same day | Highest (final) |
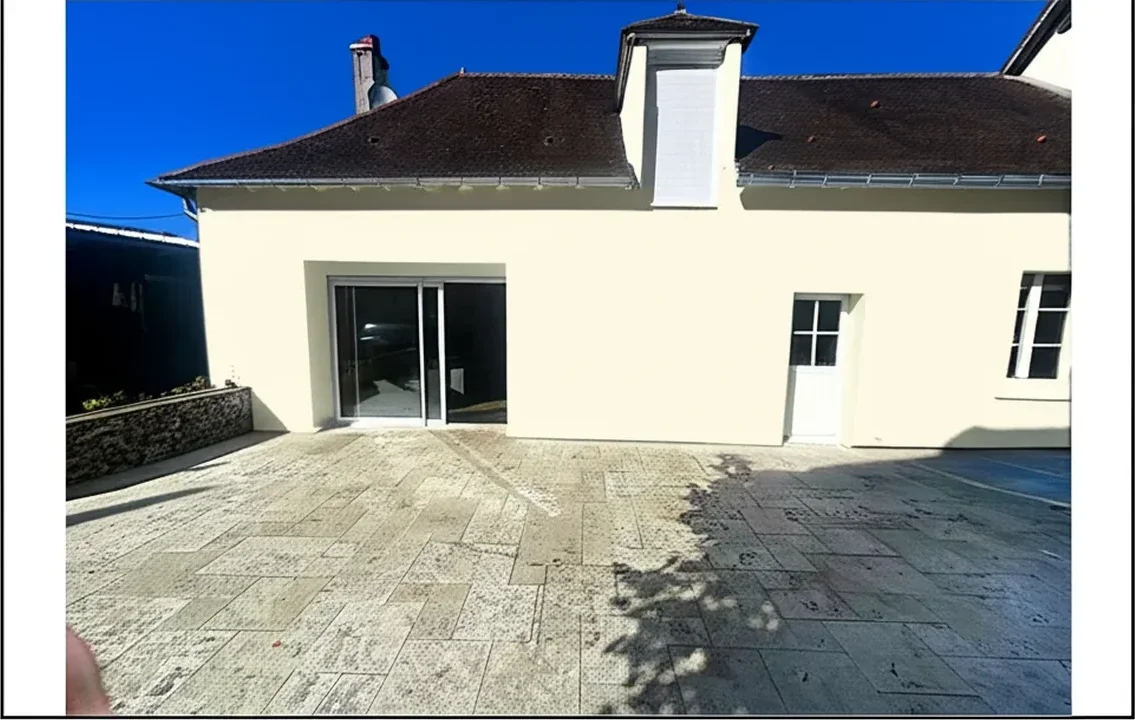
Try it on your house
No photo? Try a sample
1. Paint Chip Cards (Free at the Store)
The 2 by 4 inch chip card is the cheapest first filter and the worst predictor of how a color reads on a wall. Use chips only to narrow a long list (10 to 12 candidates) down to a manageable shortlist of 3 to 4. Bring them home, tape them to the wall in question, and step back 8 feet. Anything that looks wrong from across the room is gone. Anything that survives that test moves on to a real method. Never order paint based on a chip alone: the white card background makes every shade look 20% lighter and cooler than it actually applies.
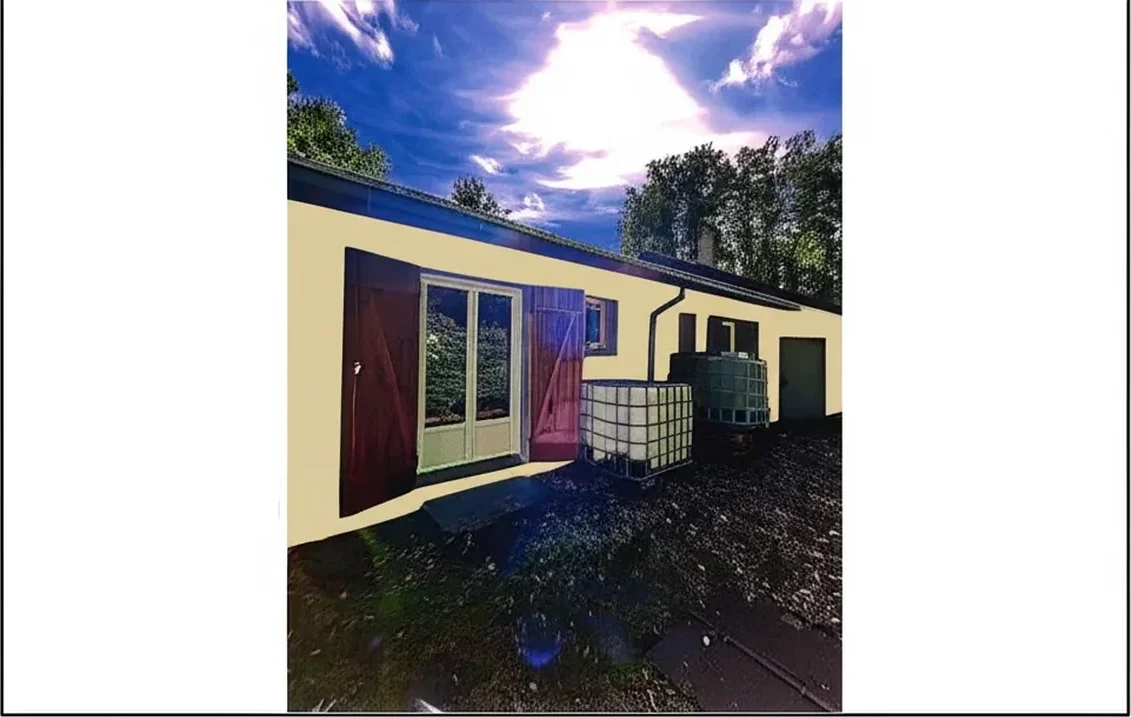
2. AI Visualizer (FacadeColorizer, Instant and Free)
The AI visualizer is the modern equivalent of testing 20 sample pints in 30 seconds. Upload a daylight photo of your facade to FacadeColorizer and apply any Sherwin-Williams, Benjamin Moore, Behr, PPG, or Valspar color in seconds. The tool segments siding, trim, fascia, soffit, and front door separately so you can test full palettes, not just body colors. Use it for unlimited iteration in the narrowing phase, then validate the finalist with one physical method. The free tier covers 1 HD render plus 3 free variations.
3. Samplize and Color2Sample Peel-and-Stick
Samplize peel and stick sells 12 by 12 inch reusable vinyl swatches printed with calibrated paint film for $5 to $8 each. Color2Sample offers a similar product. Both ship 2 to 5 days, stick cleanly to siding, brick, or stucco, and reposition without residue. Buy peel-and-stick samples for your final 2 to 3 colors after AI has eliminated the losers. They are the cleanest physical reality check before you commit to a sample pint.
4. 4x4 Painted Foamcore Boards
For homeowners who already have sample pints on hand, paint a 4 by 4 foot foamcore board with 2 coats of each candidate (full coverage matters: thin coats lie). Foamcore boards from craft stores cost $3 each and let you carry the sample to every elevation, every time of day, and even hold it up against the roof and trim to check undertone interaction. Boards beat painting directly on siding because you can move them, photograph them, and store them flat for the next phase of the project.
5. Actual Paint Sample Pints (The Final Confirmation)
Sherwin-Williams, Benjamin Moore, and Behr all sell tinted sample pints in the $5 to $12 range. These are the gold standard and the most expensive method per swatch. Use them only on your final 1 or 2 candidates, painted directly on the siding (or on a foamcore held against it) in a 2 by 2 foot patch in 2 coats. Observe at 8 AM, noon, and 5 PM for 48 hours before committing. A sample pint is the last filter, not the first; spending $50 on five pints to narrow a long list is the most common rookie mistake.
When to Use Each Method: The Funnel
The right answer is rarely one method. It is a funnel that drops candidates at each stage so you are spending the most money on the fewest colors. Here is the sequence professional color consultants follow in 2026, refined from the 16,983 facade simulations we have analyzed.
| Stage | Goal | Best Method | Cost |
|---|---|---|---|
| Stage 1: Inspiration | Build a long list of 10 to 12 ideas | Pinterest plus paint chip cards | Free |
| Stage 2: Narrowing | Cut 10 to 3 candidates | AI visualizer on your photo | Free |
| Stage 3: Reality check | Validate top 3 against real light | Samplize peel-and-stick | $15 to $24 |
| Stage 4: Final commit | Confirm winning color | Sample pint at scale, 4 orientations | $5 to $12 |
This funnel costs $20 to $36 total instead of the $60 to $120 most homeowners spend ordering 5 or 6 sample pints up front. The savings come from killing 70% of candidates before any physical sample is ordered, which is exactly where the AI visualizer earns its place in the workflow. For the strategic context on why sampling matters at all, see our pillar how to choose exterior house color 2026 guide, and for a deeper teardown of the visualizer landscape, our 2026 best exterior paint visualizers comparison ranks the top 8 free and paid tools by render accuracy.
The 4-Orientation Test (Biggest Mistake: Skipping It)
The single biggest sampling mistake we see in our data is testing a color on only one side of the house. Light direction changes how a paint reads by enough to make a homeowner say "I love it" on the south wall and "this is the wrong color" on the north wall of the same house in the same hour. The fix is the 4-orientation test: paint the same color sample on the north, south, east, and west elevations and observe each at the same time of day.
What each orientation reveals:
- North-facing: Cool, diffused light. Pulls blue and green undertones forward. Warm whites can read gray; cool grays can look slate-blue. If you love a color here, it will hold up everywhere.
- South-facing: Maximum sun, year round. Colors read 1 to 2 shades lighter. A warm beige can wash out to cream; a deep navy can soften to slate. Pick a notch deeper than you think.
- East-facing: Bright warm morning light, cool soft afternoon. Most forgiving. Colors look closest to the swatch here. Useful as the baseline reference.
- West-facing: Soft cool morning, intense warm afternoon. Reds, oranges, and warm beiges glow at golden hour. Dark colors absorb heat: expect 30 to 50 F warmer surface temperature than air.
The 4-orientation test catches the single largest source of after-paint regret: undertone shift you never saw because you tested only on one wall. If your house only has 2 or 3 exposed elevations, test those, but always include both warmest and coolest sides if you have them. For deeper guidance on north-facing undertone behavior in whites specifically, see our SW Alabaster north-facing undertones guide.
Time of Day Comparison (3 Reads in 48 Hours)
Paint shifts with the sun, and a color that looks balanced at noon can read warm at sunset and cool at sunrise. The professional protocol is a 3-window observation across at least 48 hours, with photos at every check.
- Morning (8 to 9 AM): East wall in direct sun, north wall in flat diffused light. Captures the cool end of the day. A warm white that pulls pink here will pull pink in shadow forever.
- Noon (12 to 1 PM): Reference read. All walls receive their most neutral daylight. Closest to how the brand intends the color to appear.
- Late afternoon (5 to 6 PM): West wall glow, south wall warm angle. Captures the golden hour shift. A neutral greige can read distinctly warm here.
Repeat the 3 reads across a sunny day and an overcast day so you see both the brightest and dullest light your house will ever see. Most homeowners skip the overcast day and are then surprised when their fresh paint looks dingy on the first rainy Sunday. The AI visualizer can preview each lighting condition by uploading photos taken at different times: a 5-minute exercise that catches the same undertone shifts as a 48-hour physical sample window.
Sample Card Pitfalls (Why the Free Chip Lies)
Free paint chip test cards from a paint store are useful for inspiration and impossible as a final decision tool. Three optical and physical issues distort what you see on the card, and every one of them favors the color looking better on the chip than it will on your wall.
- Pitfall 1: Too small. A 2 by 4 inch chip shrinks the apparent saturation. The brain reads a small bright sample as much more intense than the same color at wall scale. Result: most homeowners under-pick saturation and end up with a finished wall that looks washed out.
- Pitfall 2: Too matte. Chip cards print on a matte card stock with calibrated ink, not actual paint. Real paint has sheen (flat, eggshell, satin) that interacts with light and shifts the perceived color by up to 5%. A chip can read warmer than the same paint applied at satin sheen.
- Pitfall 3: White background bias. Every chip card has a white border. The eye reads the swatch against white, which makes the color look 20% darker and cooler. Hold the same chip against a brown roof or cream brick and it reads differently. This is why a "perfect" chip can look "off" the moment you tape it to the wall.
- Pitfall 4: Store lighting. Paint stores use 4000K to 5000K fluorescent or LED lighting. Daylight is 5500K to 6500K and shifts hourly. A chip evaluated under store light is being read at the wrong color temperature.
- Pitfall 5: Multi-color chip layouts. Brands love to print 4 to 6 related shades on one card. Adjacent colors influence each other through simultaneous contrast: a beige next to a deeper brown looks lighter than the same beige next to a cream. You are reading interactions, not the color itself.
The fix is never to make a final decision from a chip. Chips earn their place at the start of the funnel (Stage 1 inspiration), then the AI visualizer and physical samples take over. If you want to test how a specific Sherwin-Williams shade looks on your house before ordering any chip or pint, our 2026 Sherwin-Williams paint visualizer review walks through the official Color Visualizer and the best free alternatives. For Benjamin Moore, see our companion Benjamin Moore color visualizer free alternative teardown.
Step-By-Step: The 30-Minute Home Sampling Protocol
If you only have one afternoon to sample, here is the exact sequence we recommend after running through 16,983 previews. This protocol gets you from 10 candidates to one confident pick in 30 minutes plus shipping time on physical samples.
- Minute 0 to 5: Gather a daylight photo of your front facade with no shadows across the body and no parked car blocking the view. South-facing afternoon photos work best.
- Minute 5 to 15: Upload to FacadeColorizer and run all 10 candidates as AI previews. Eliminate 7 immediately based on undertone mismatch with your roof.
- Minute 15 to 20: Apply the surviving 3 colors with full palette (body, trim, door) on your photo. Download HD renders. Compare side by side.
- Minute 20 to 25: Show the 3 renders to your spouse, contractor, or HOA board. Pick top 2.
- Minute 25 to 30: Order Samplize peel-and-stick samples of the final 2. Arrival in 2 to 5 days.
- Day 3 to 5: Apply both peel-and-stick samples to north, south, east, and west walls. Observe at 8 AM, noon, and 5 PM for 48 hours.
- Day 7: Order 1 sample pint of the winner. Paint a 2 by 2 foot patch on the most visible elevation. Confirm.
- Day 9: Order full gallons and book your painter.
Total physical sample cost: $15 to $36 (two Samplize plus one sample pint). Total time: 9 days from first AI render to ordering paint. Compare against the typical untested approach of buying 5 sample pints up front ($60), painting random patches, and still hesitating at week 3.
Free Tools Beyond FacadeColorizer
While our AI is the fastest in-context preview tool for exterior facades, several other free visualizers are useful at the inspiration stage. Use them in combination, not in isolation, for the most balanced view of how a color will read.
- Free house paint visualizer 2026: Roundup of 12 truly free tools including our own and the official brand offerings.
- Paint color visualizer apps comparison 2026: Side-by-side teardown of mobile-first apps for AR-style room and exterior preview.
- Sherwin-Williams Color Snap: Free brand-specific tool that lets you upload a photo and apply any SW deck color. Useful for inspiration but limited segmentation accuracy on complex facades. See Sherwin-Williams sampling resources.
- Benjamin Moore Color Portfolio: Similar brand-specific tool with a strong color library and weaker upload-and-render flow.
- HGTV color galleries: The HGTV exterior paint color ideas hub is one of the best curated inspiration boards on the open web, useful for building your initial long list before any digital sampling starts.
For the full 2026 best picks, see our 2026 best exterior paint colors roundup, which is the recommended starting point for the inspiration stage.
FAQ: Paint Color Sampling at Home
What is the best way to test paint color at home?
The best way to test paint color at home in 2026 is a 4-step funnel: paint chip cards to gather 10 candidates, AI visualizer (free) to narrow to 3, Samplize peel-and-stick swatches to validate against real light, then one sample pint of the winner for final confirmation. This sequence costs $20 to $36 total versus $60 to $120 for the typical "buy 5 sample pints up front" approach.
How much do Samplize peel and stick samples cost?
Samplize peel-and-stick samples cost $5 to $8 each as of 2026, in a 12 by 12 inch reusable vinyl format printed with calibrated paint film. Shipping runs 2 to 5 days depending on location. Color2Sample offers competing products in the same price range. Both stick cleanly to siding, brick, or stucco and reposition without leaving residue.
Why does my paint look different on the wall than the chip?
Chip cards distort color through 5 issues: too small (saturation reads higher), too matte (no sheen interaction), white background bias (reads 20% darker), wrong color temperature under store lighting, and simultaneous contrast from adjacent shades on multi-color cards. Real paint at wall scale will shift undertones and apparent lightness in every direction. The fix is to validate every chip pick on either an AI visualizer of your actual photo or a physical peel-and-stick sample.
How many paint samples should I order before painting my house?
Order 2 to 3 peel-and-stick samples after the AI visualizer narrowing stage, then 1 sample pint of the final winner. Do not order more than 3 physical samples: doing so means the narrowing step has not done its job. The most common mistake is buying 5 to 6 sample pints up front before any in-context preview, which costs $60 to $120 and adds 3 weeks of decision paralysis.
Can I test paint colors with an app?
Yes. AI-powered visualizers like FacadeColorizer let you upload a photo of your house and preview any paint color in 30 seconds. The tool segments siding, trim, fascia, soffit, and front door so you can test full palettes, not just the body color. Brand-specific apps (Sherwin-Williams Color Snap, Benjamin Moore Color Portfolio) work for deck-specific browsing but typically have weaker segmentation on complex facades.
Do I need to test paint colors on all 4 sides of my house?
Yes. Light direction changes how a paint reads enough that the same color looks different on the north, south, east, and west walls. North-facing pulls cool undertones forward, south-facing washes colors lighter, east is the most forgiving baseline, and west glows warm at golden hour. Skipping the 4-orientation test is the single largest source of undertone regret in our sampling data.
What time of day should I look at paint samples?
Observe at 8 to 9 AM (cool morning), 12 to 1 PM (neutral reference), and 5 to 6 PM (warm golden hour) across at least 48 hours including both a sunny day and an overcast day. Most homeowners only check at one time of day, then are surprised when the color looks different in evening light or on a rainy Sunday. A 3-window protocol catches almost every time-of-day shift.
How can I sample paint without buying sample pints?
Use a free AI visualizer like FacadeColorizer to test unlimited colors on a photo of your house, then order $5 to $8 Samplize peel-and-stick swatches for physical validation. This combined approach skips sample pints entirely until the final confirmation step, saving $20 to $60 per project. Our AI replaces 3 to 5 paint sample pints per decision on average.
Before you spend $60 on sample pints or wait 5 days for peel-and-stick swatches, upload a photo to FacadeColorizer and run all your candidates in 30 seconds. Narrow 10 to 3, then validate only the finalists with physical samples. The funnel saves money, time, and the most expensive regret in home improvement: paint that has to come off.
Trademarks mentioned (Sherwin-Williams, Benjamin Moore, Behr, Caparol, Brillux, Sto, Alpina, Valspar, PPG, Glidden, Dulux, Crown Trade, Sandtex, Farrow & Ball, Johnstone's, Leyland) are property of their respective owners. FacadeColorizer is independent and not affiliated with any of them. Nominative fair use under Lanham Act §1125.